Set up your status page(s)
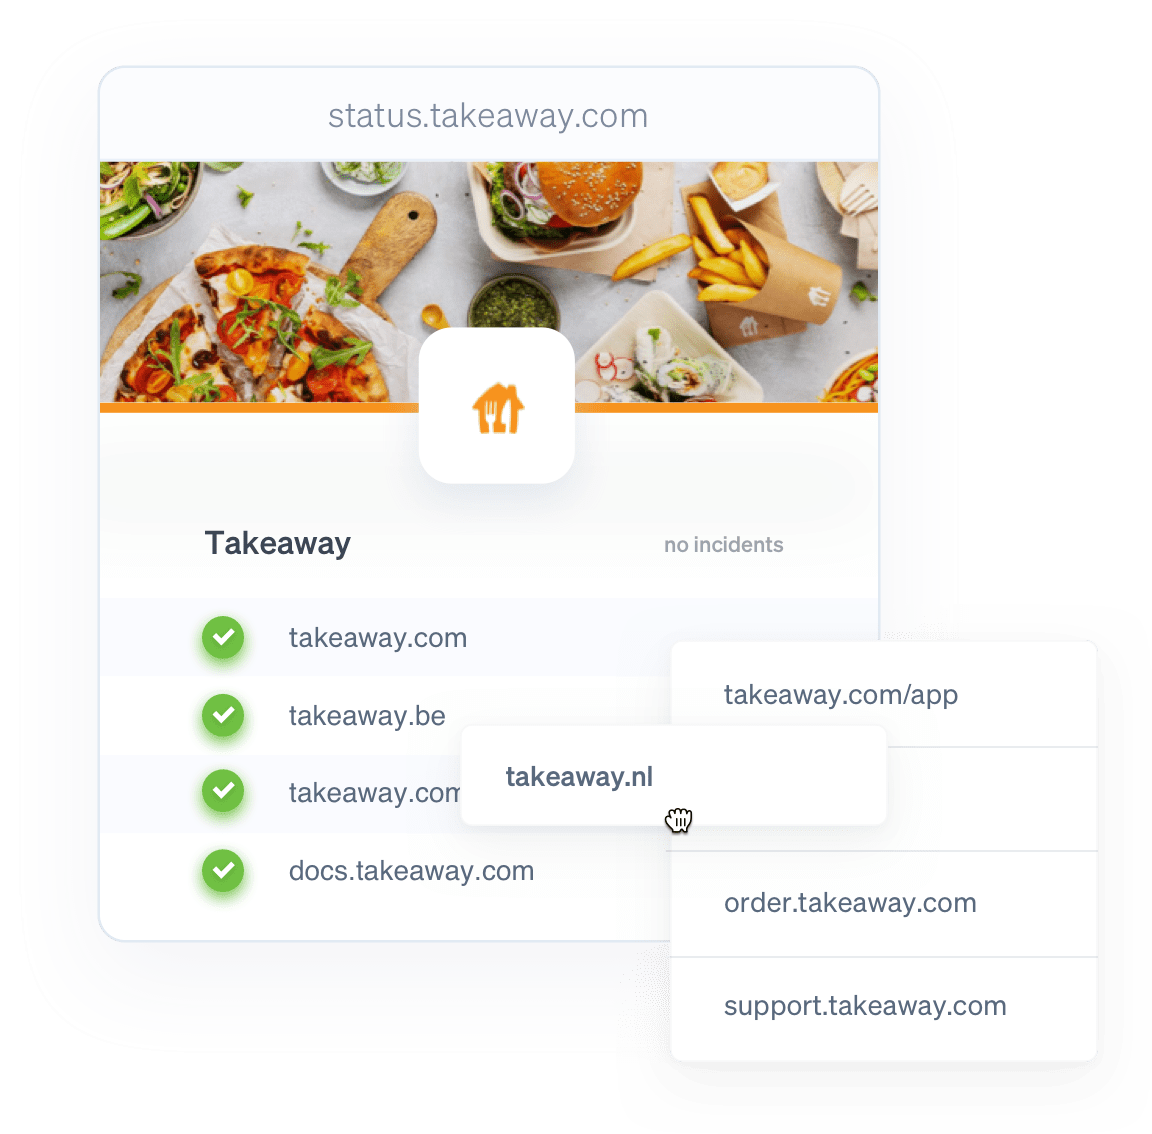
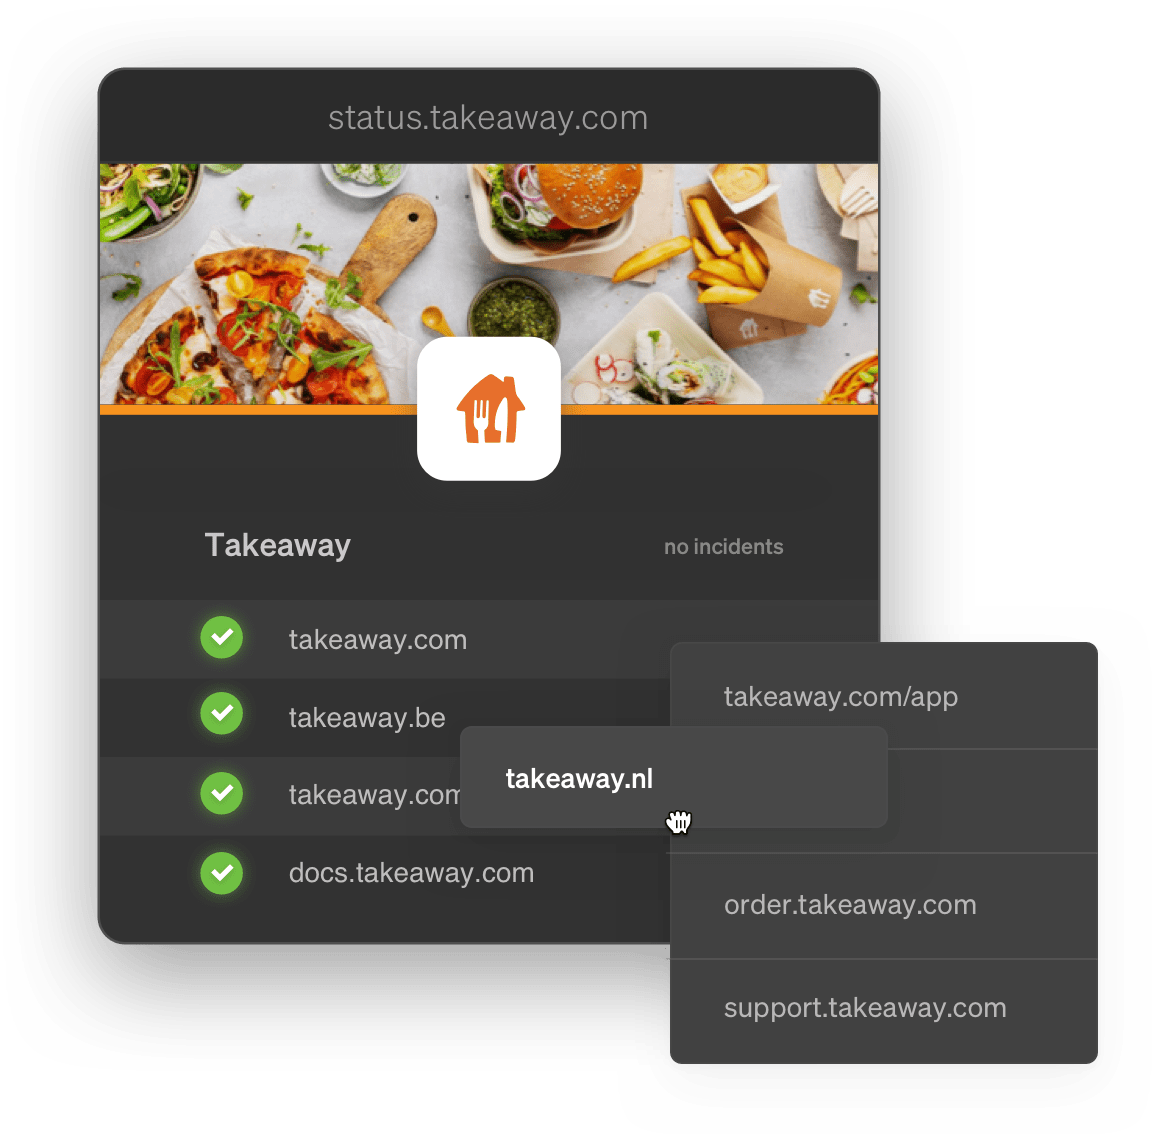
You're free to create as many status pages as you'd like. On each status page, you determine which websites should be included.
You can create a status page per website and give it to your end users. Or you can create one big status page with every site on it, and use it as your office dashboard. The choice is yours.
Status pages can be multilingual as well. So you can keep your audience informed in their own language.
- You can run your own status page on your own domain. Setup is as simple as changing a single DNS record. Want to set it up? Have a look at our documentation on custom domains.
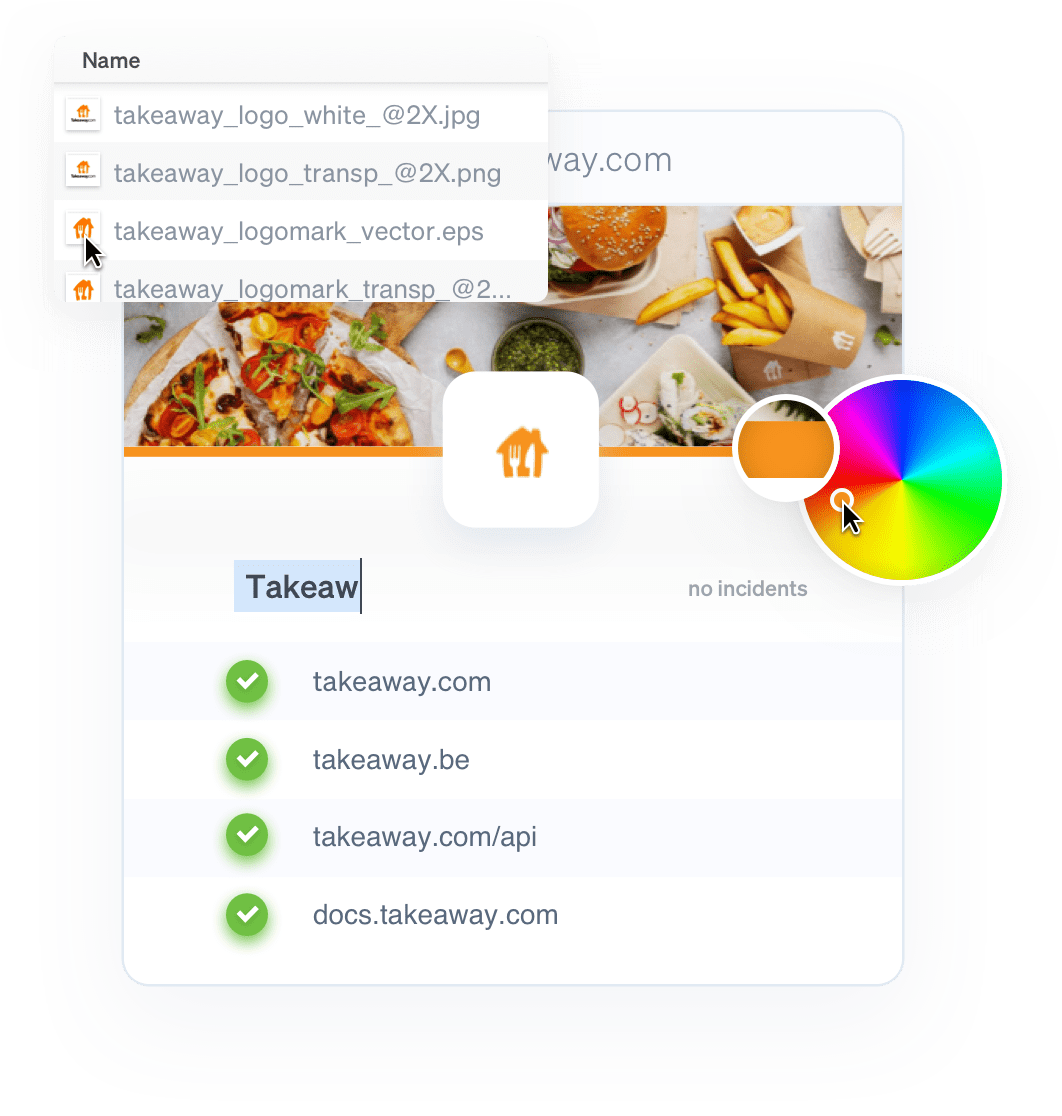
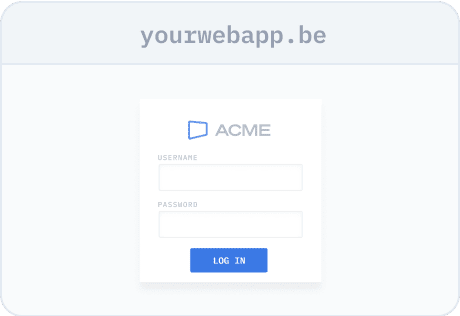
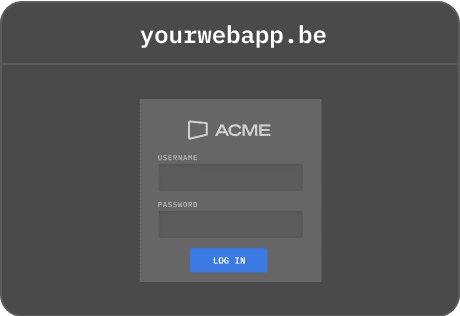
Customize the looks to match your brand
- Your status page title & welcome message
- The text for when things go down
- Your logo & favicon
- The background & text colors, border colors & width
- The URL to link back to in the top-left navigation
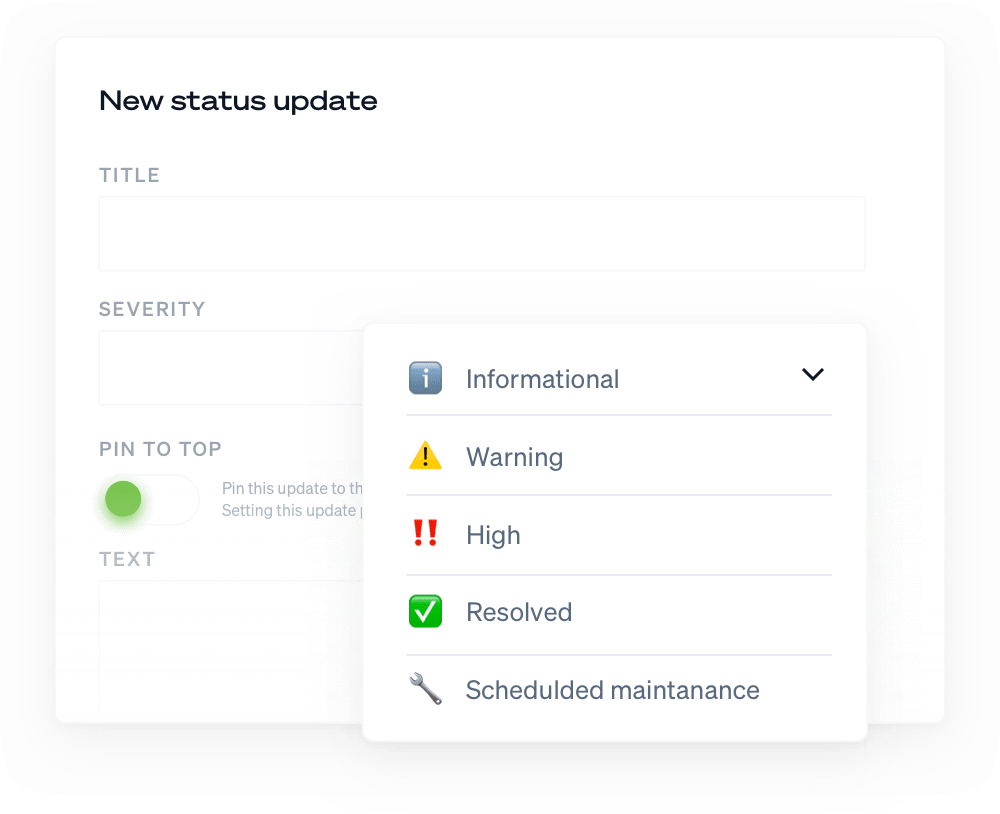
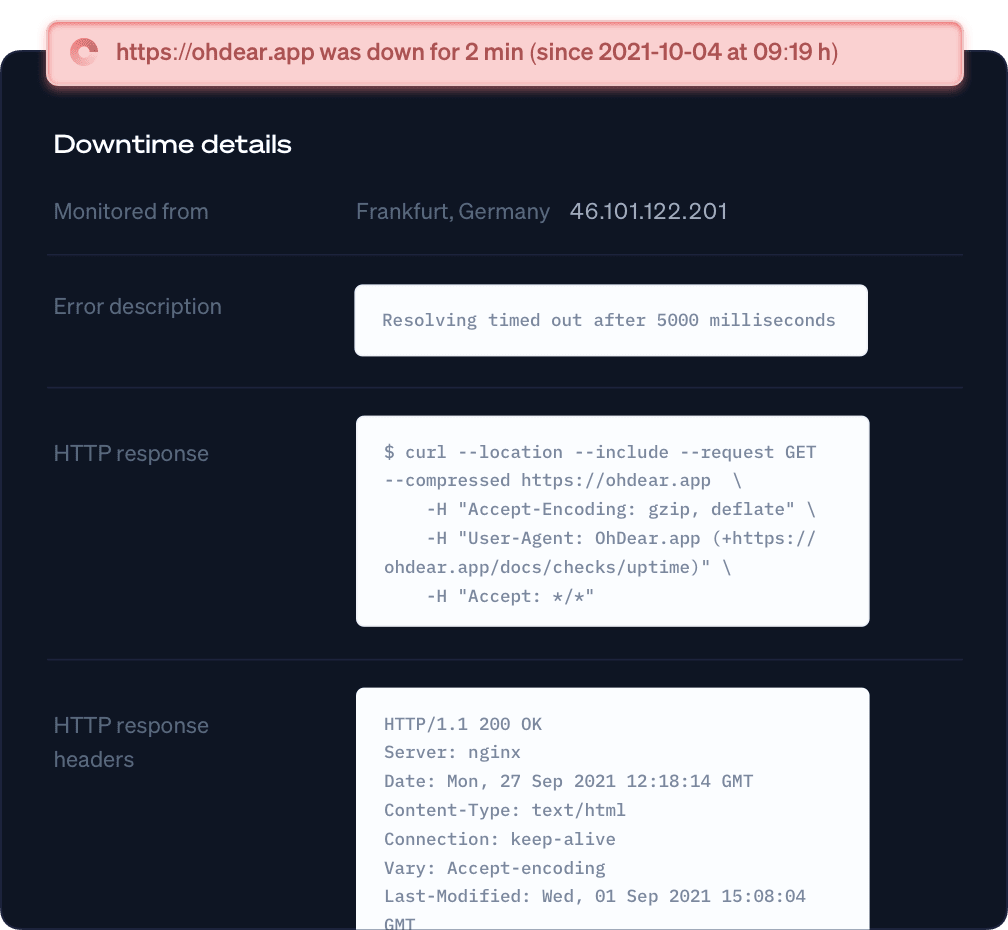
Set up updates: control what you share and how it’s shared
When tied to our uptime monitoring, we can automatically update your status pages for you with a message of your choosing.
Brutally honest or tactfully careful? You control the tone of voice and how much information you want to share.
Prefer to keep things under control and post only select messages to your status page? No problem, disable the auto-updates and every message should be posted manually - either through the dashboard or with our API.
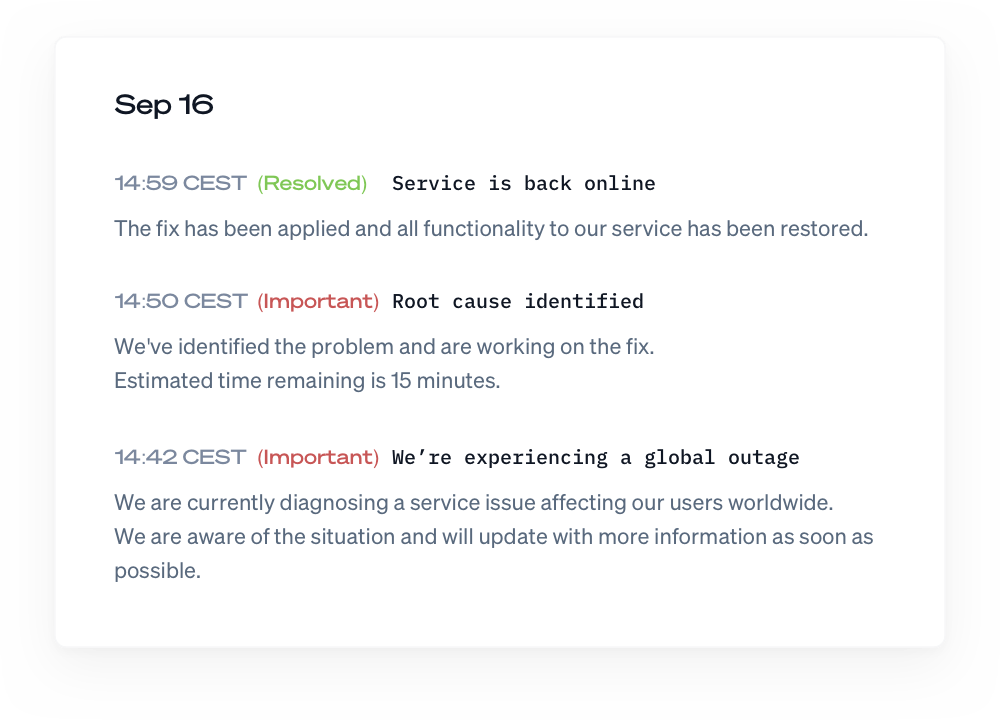
Make the difference
Downtime happens. It's how you communicate and keep your users up-to-date that makes the difference.
Our flexible messages-system lets you post updates and mark incidents as resolved. They get published to the status page and the RSS feed, keeping everyone informed.
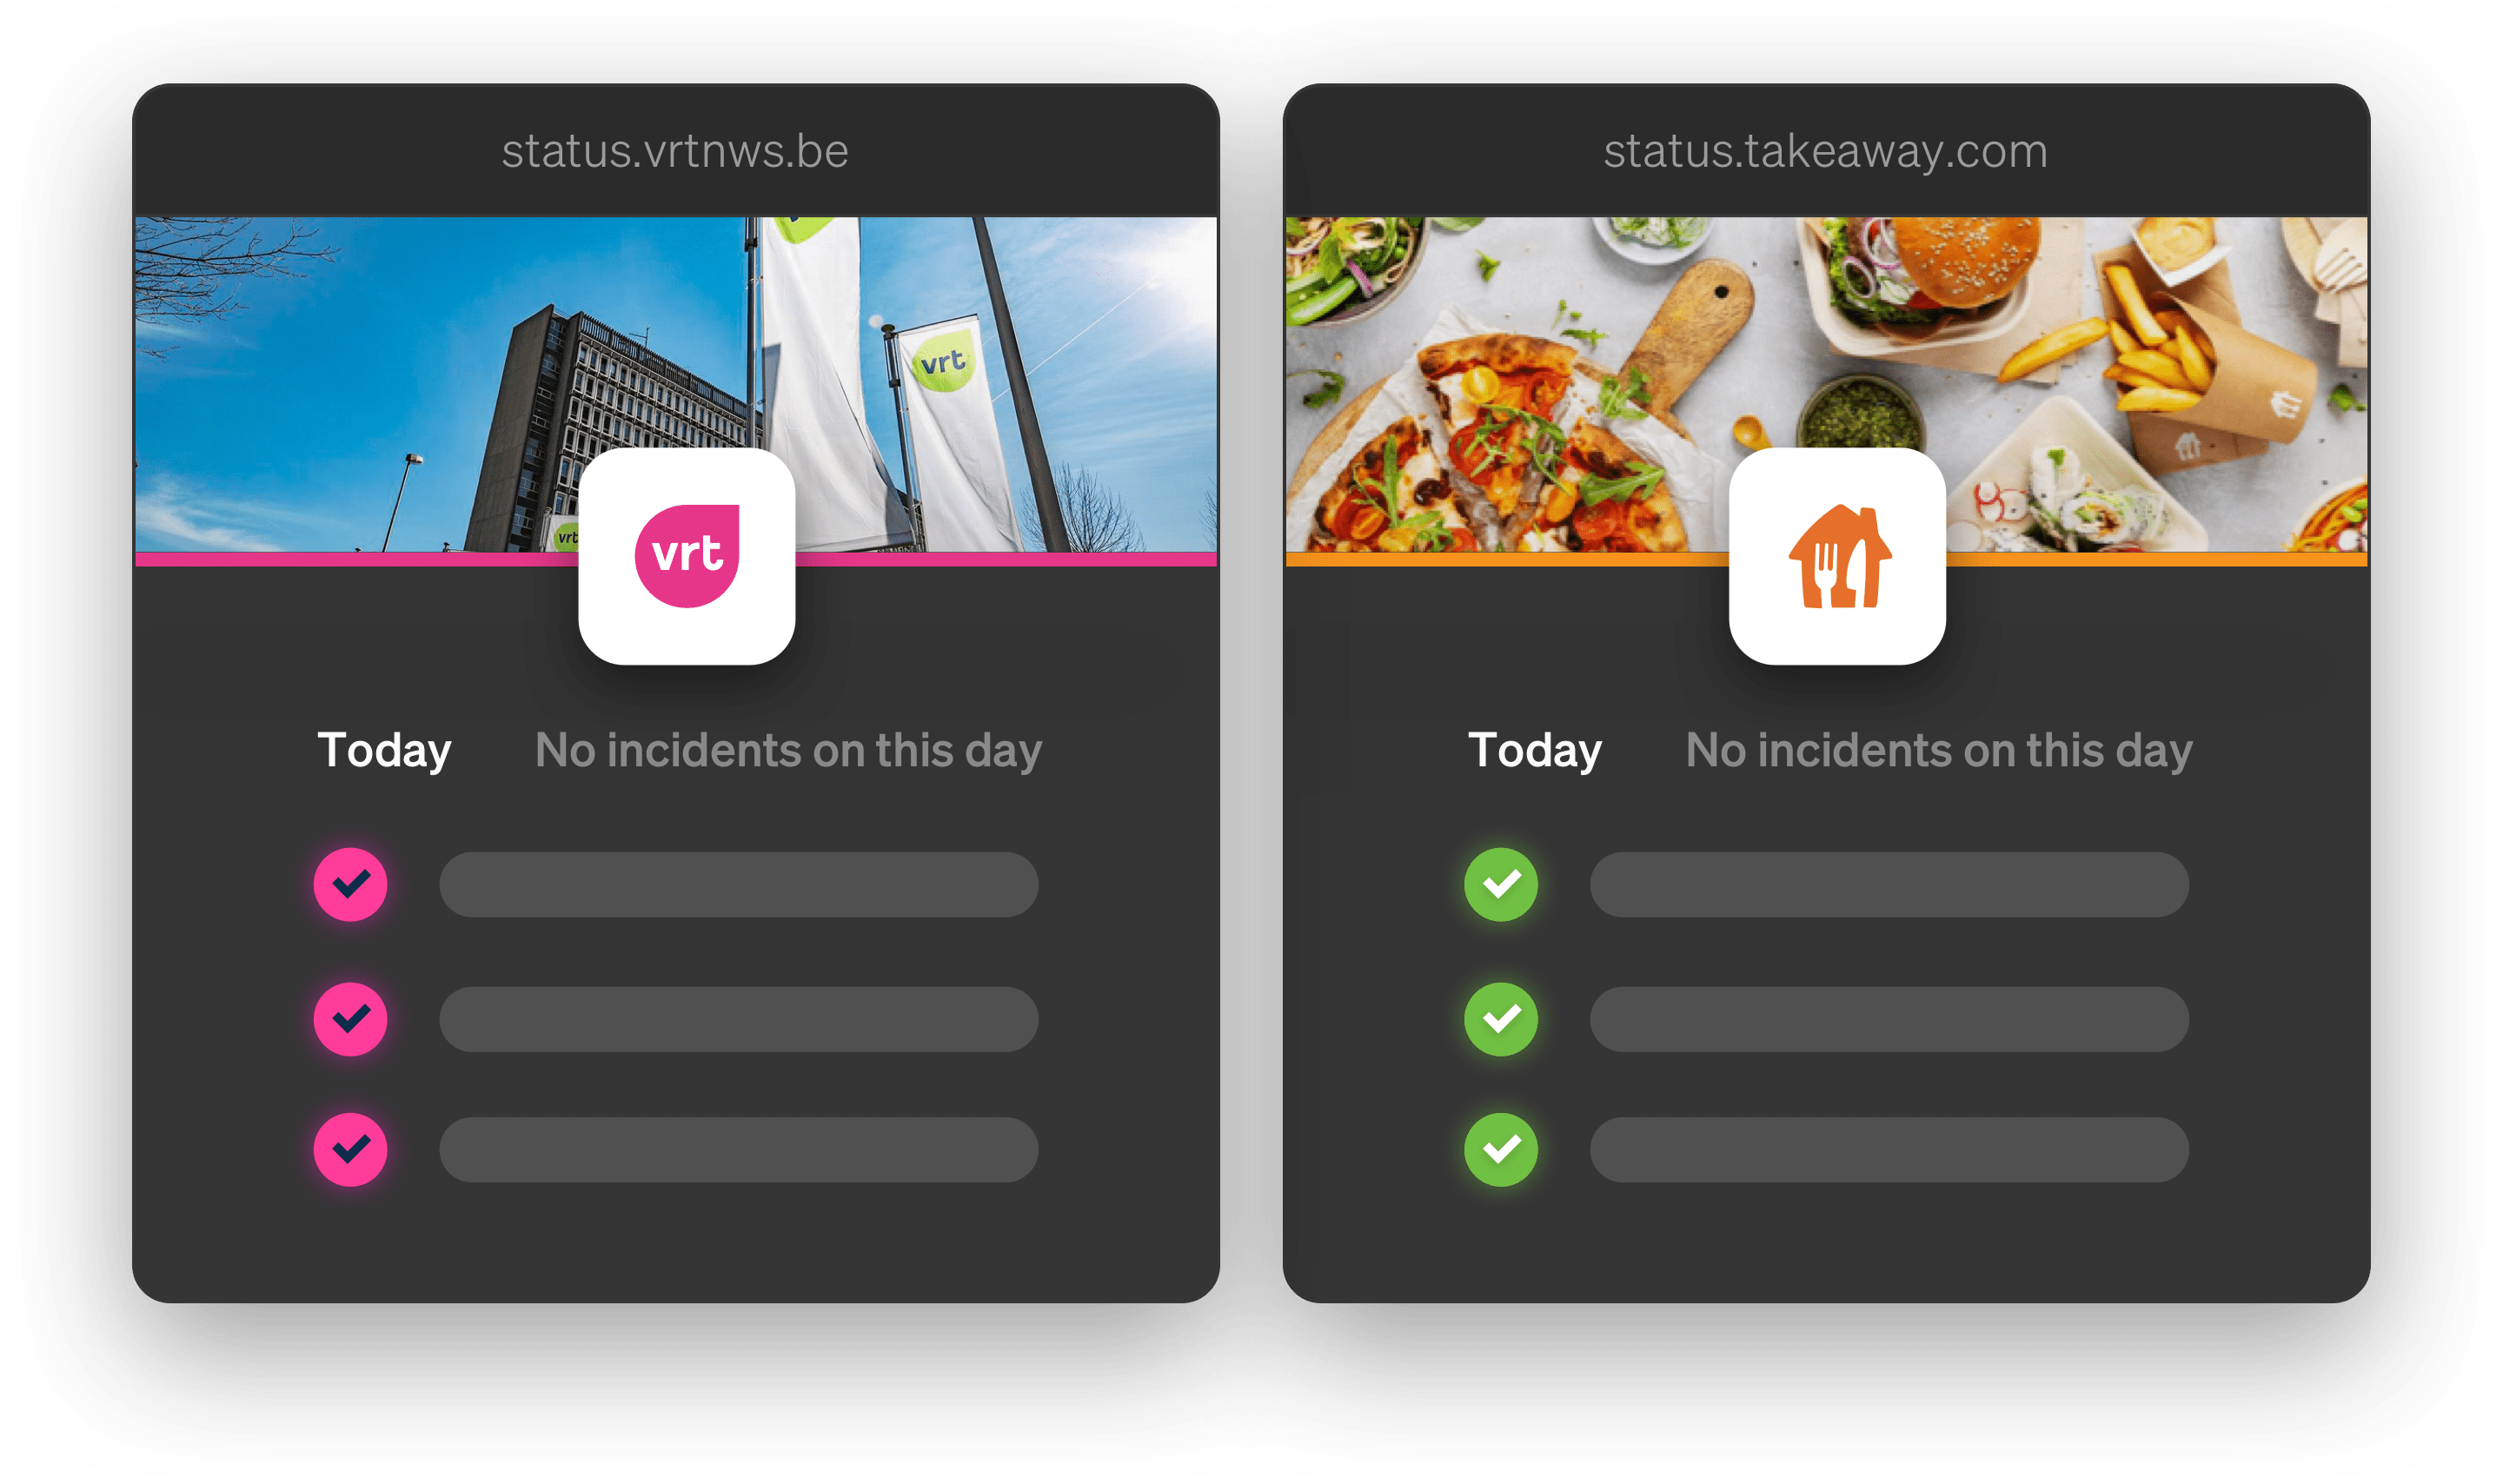
Healthy websites, happy clients
Stop worrying, start monitoring
Start a no-strings-attached 10-day free trial. You're all set in less than a minute. (No credit card needed.)
Not convinced yet? Need help? Get in touch via support@ohdear.app.
Really into the nitty gritty details?
Want to get into the nitty gritty details of our uptime monitoring?
Have a look at our documentation.
Frequently asked questions


Can I host a status page on my own domain?
Yes. Your status page lives on your own domain (status.yourcompany.com), fully branded, and is served from Oh Dear's infrastructure, so it stays online even when your own site is down.
Does the status page update automatically?
Yes. It can update straight from your monitoring results, and you can post manual incident updates alongside the automatic ones.
Can I create a public status page?
Yes. Make your status page public so customers can check it during an incident instead of filing tickets, or keep it private behind a password if it's only for your team.
Can I brand my status page?
Yes. Your logo, your colours, your domain. Visitors see your brand, not ours.
Does Oh Dear host the status page for me?
Yes. Status pages are hosted on Oh Dear's own infrastructure, separate from your stack, so an outage on your side can't take your status page down with it.
Is a status page included for free?
Status pages are included on every Oh Dear plan. There's no separate status-page subscription to buy.
Wait, there's even more
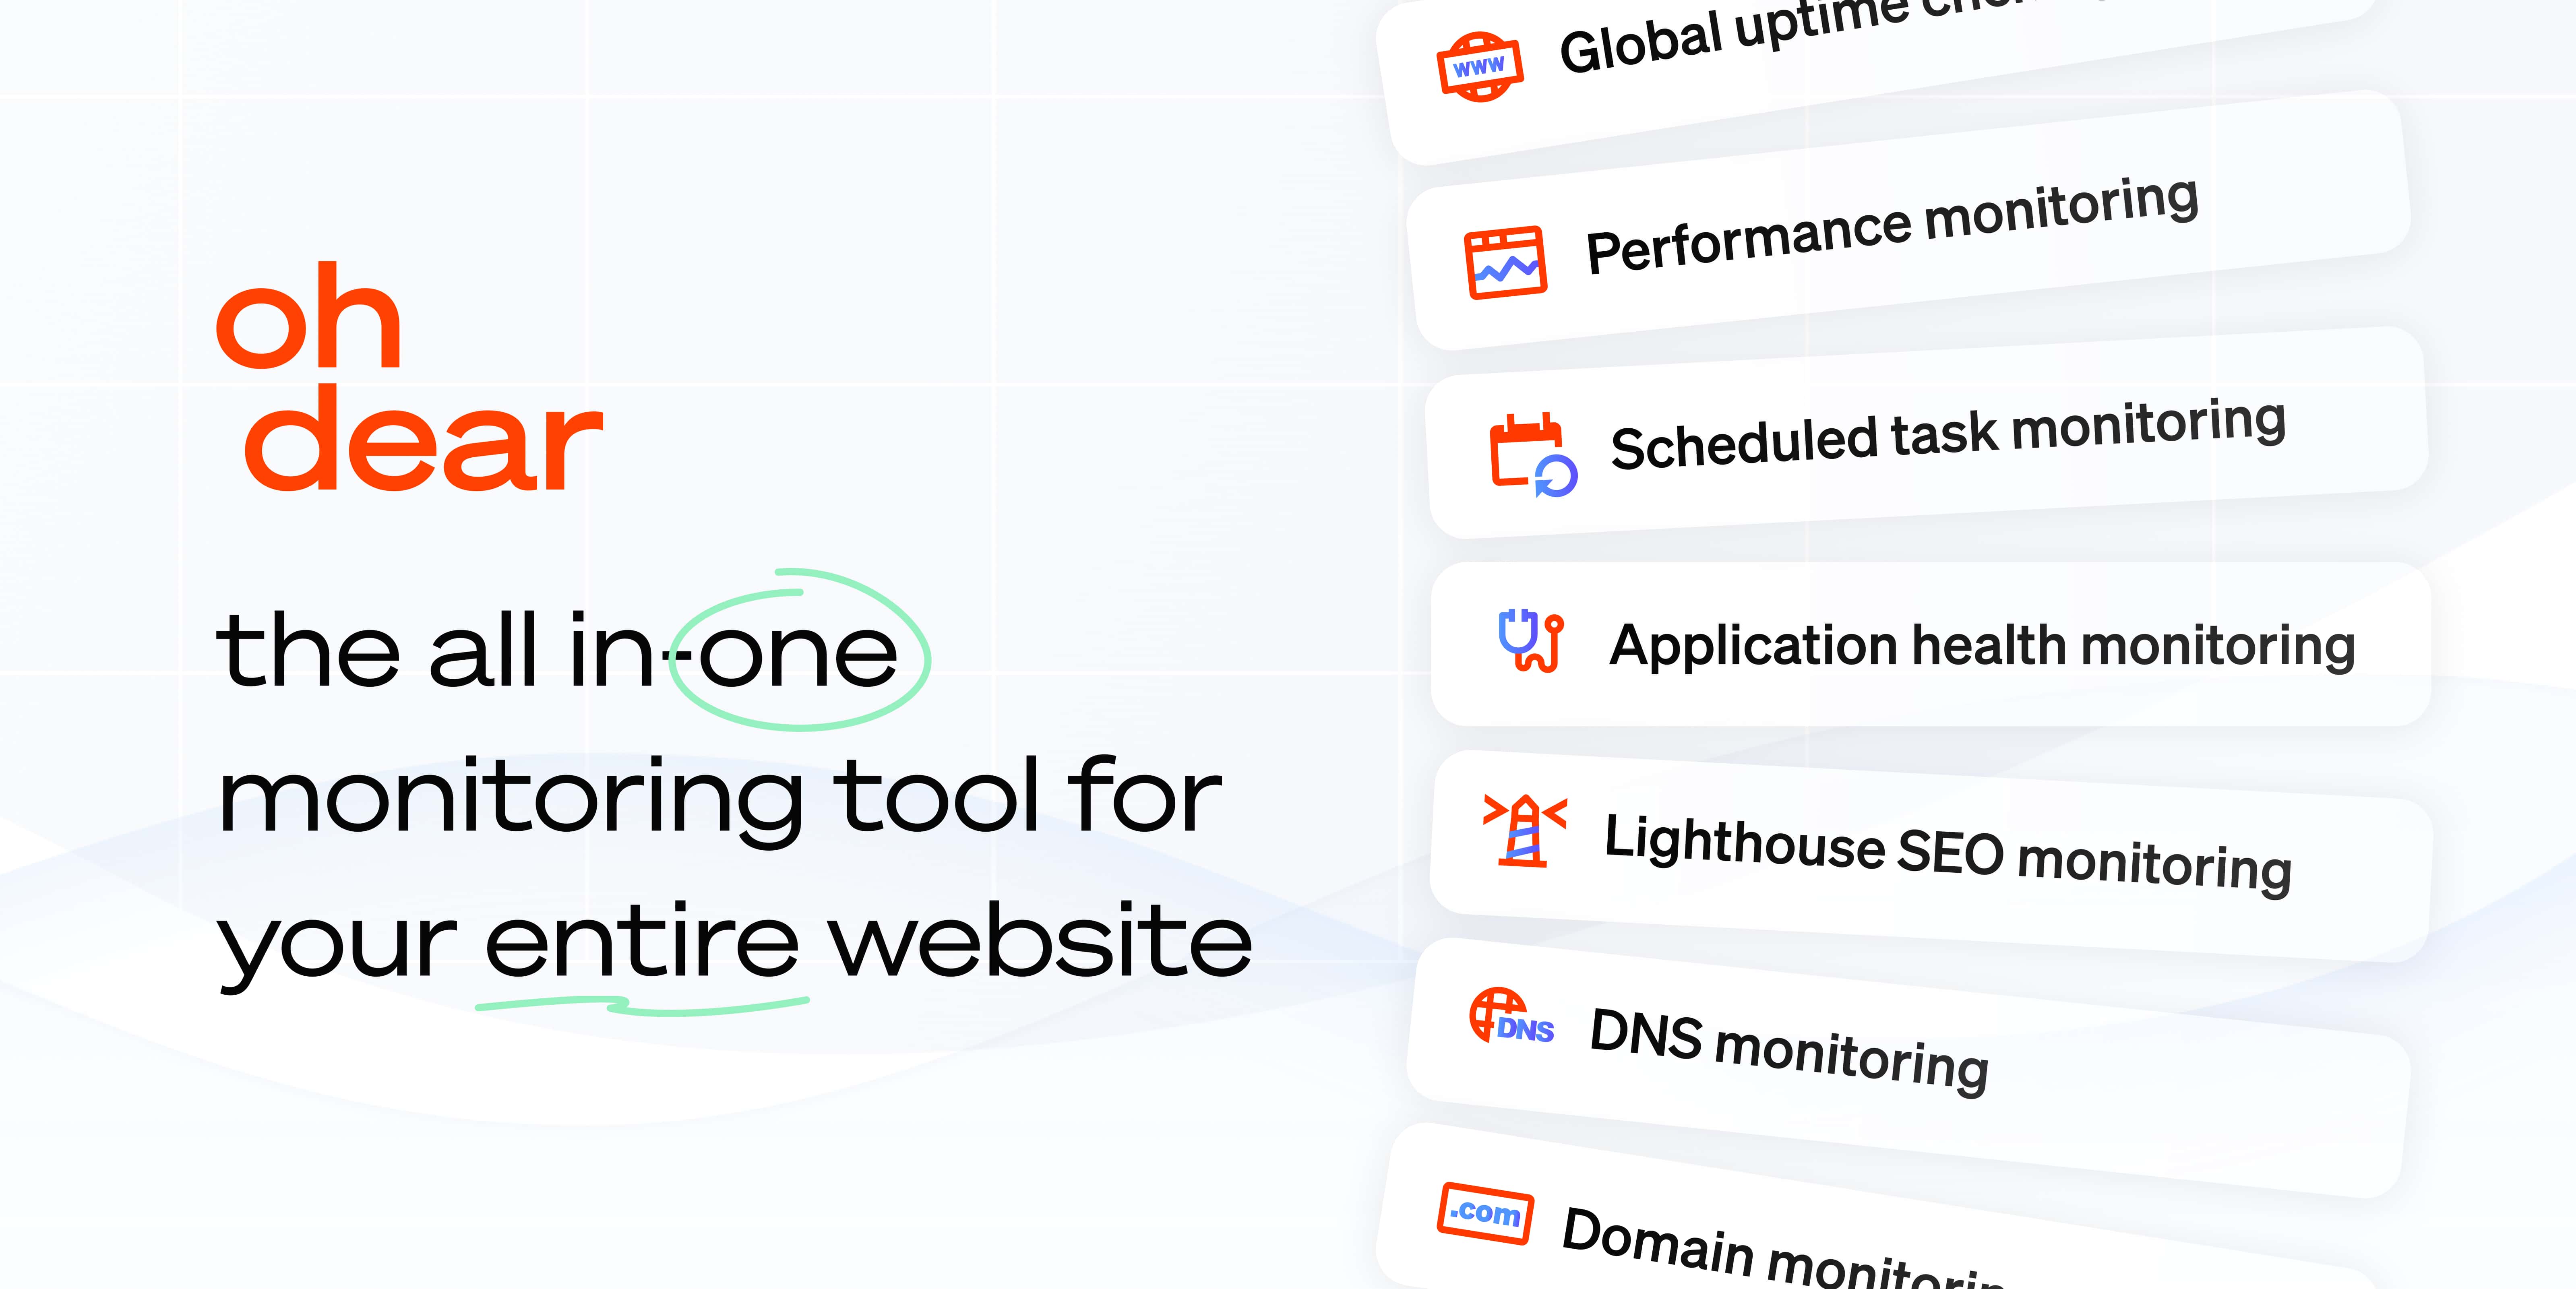
API & endpoint monitoring
Call your endpoints every minute and validate what they actually return: status codes, response bodies, headers and response times. Webhooks and scheduled jobs included.
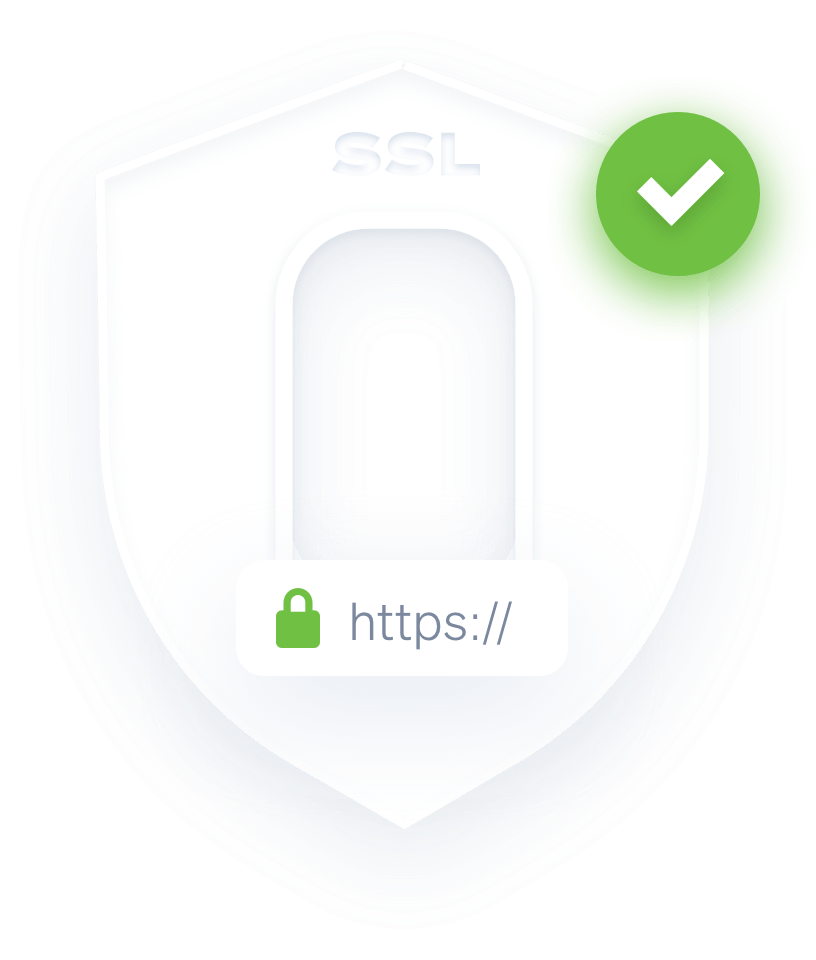
Continuous certificate monitoring
SSL certificates are essential in website security. We check all your certificate expiration dates & alert any change we detect.
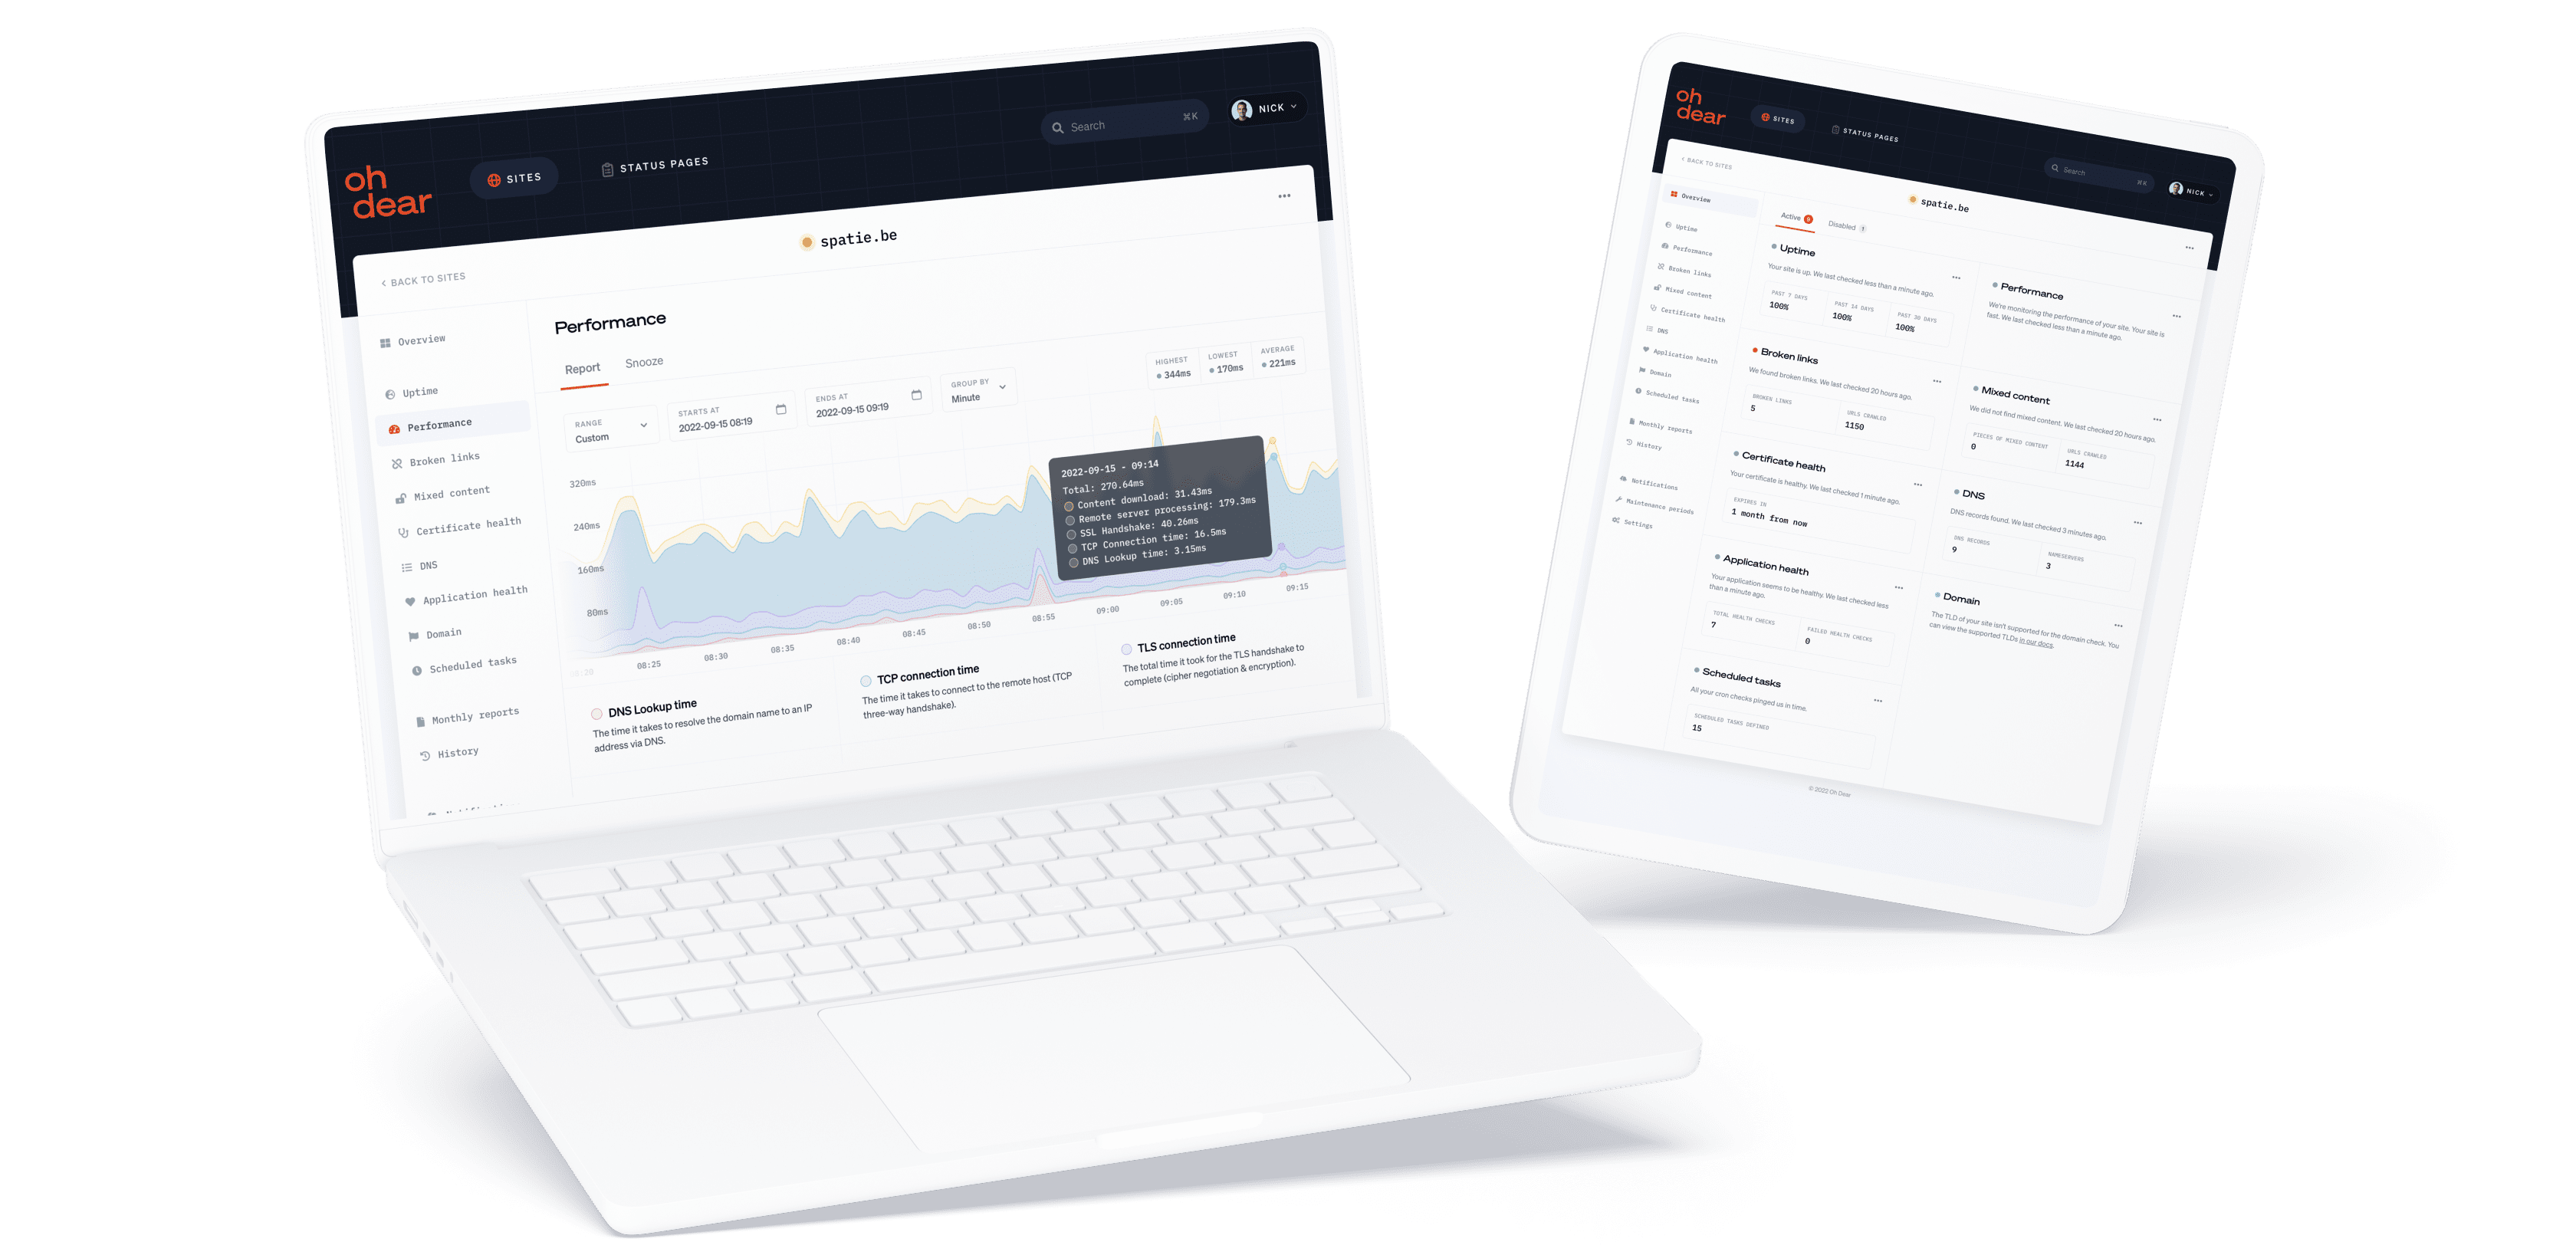
Performance monitoring
We provide highly detailed performance monitoring and insights. We'll notify you as soon as we detect your website is getting slow.


Fast and insightful notifications
Get notified instantly as soon as we detect an issue or an important change. Enable any channel you use, you're in full control.
Scheduled task monitoring
Your cron jobs (Linux) and scheduled tasks (Windows) are the heart of your data processing. We can monitor every single one of them.
Broken page & mixed content
We crawl and index your entire website, just like Google. As soon as we detect a broken link on your site we will let you know.
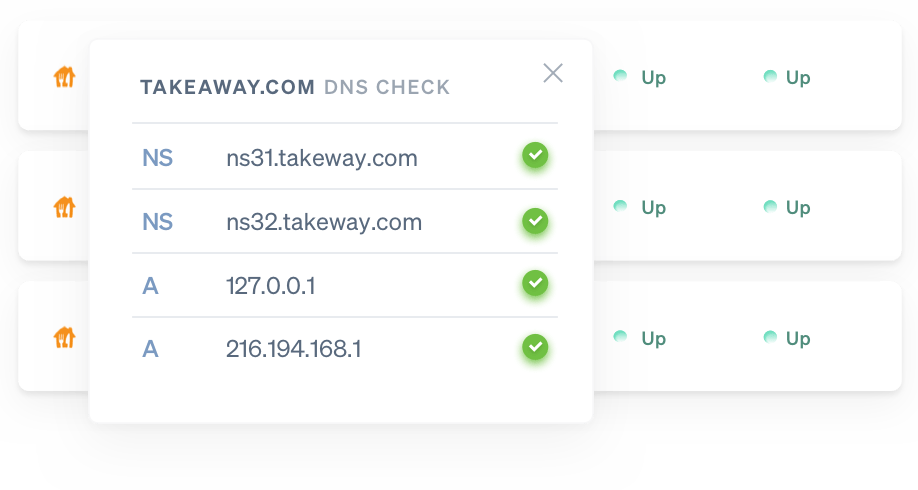
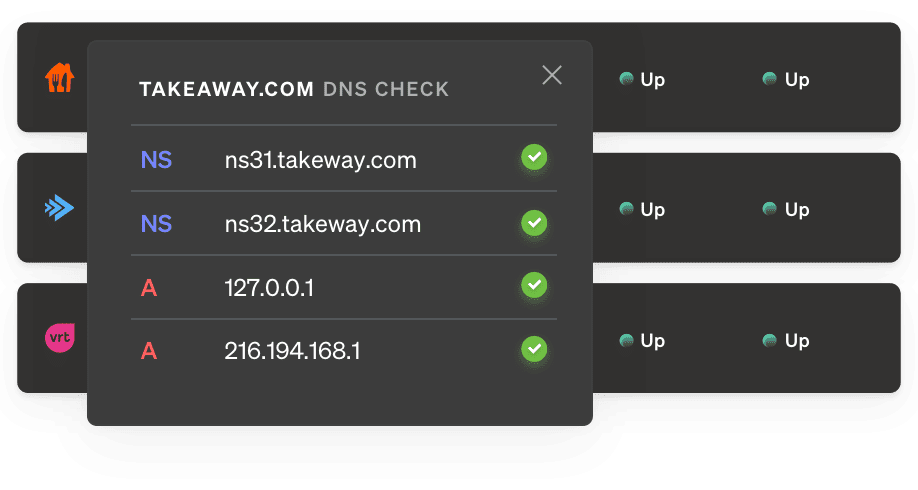
DNS record monitoring
Receive a notification whenever your DNS records are modified - intentionally or maliciously - so you can act and verify faster.
Application health monitoring
A lot can go wrong inside your app and server. Disk space may fill up, or the database may go down. We'll notify you when something is off.
 laravel.com
 ign.com
 takeaway.com
Website uptime monitoring
When your website goes down we'll let you know instantly. Now you can act before your or your client's brand reputation takes a hit.
Domain monitoring
We can check how long your domain is still registered. If your renewal date is close, we'll notify you. This will avoid you losing your domain.
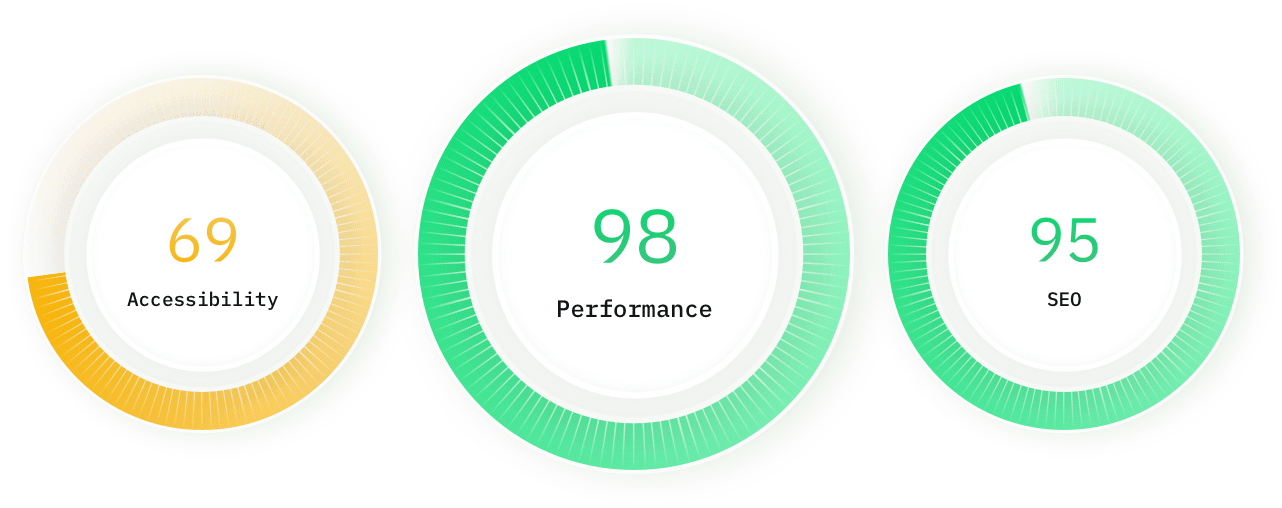
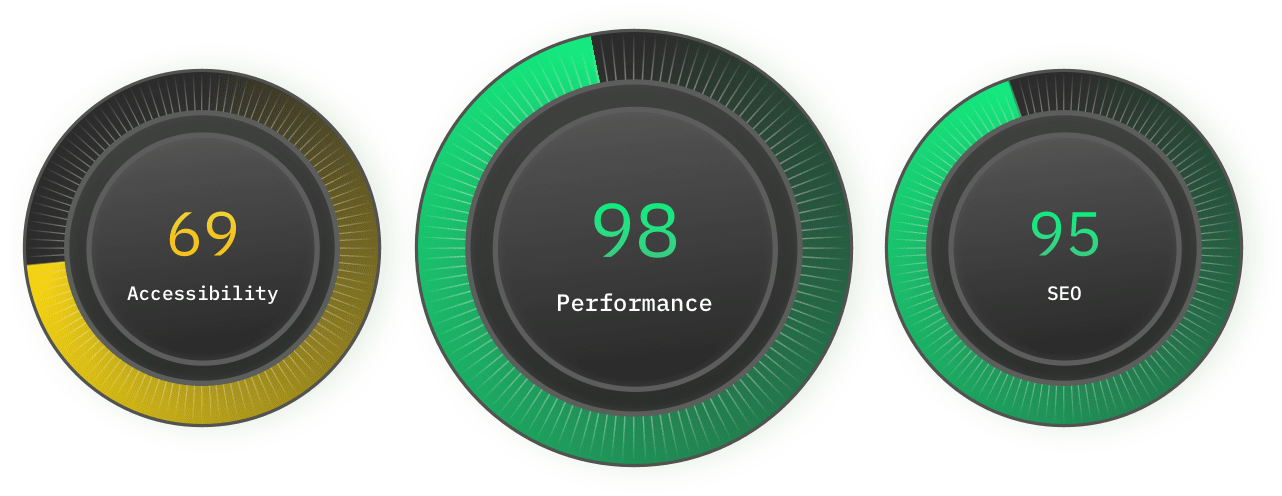
Lighthouse SEO monitoring
We track the speed & performance of your website over time. If we detect your website is suddenly slower, we'll let you know.
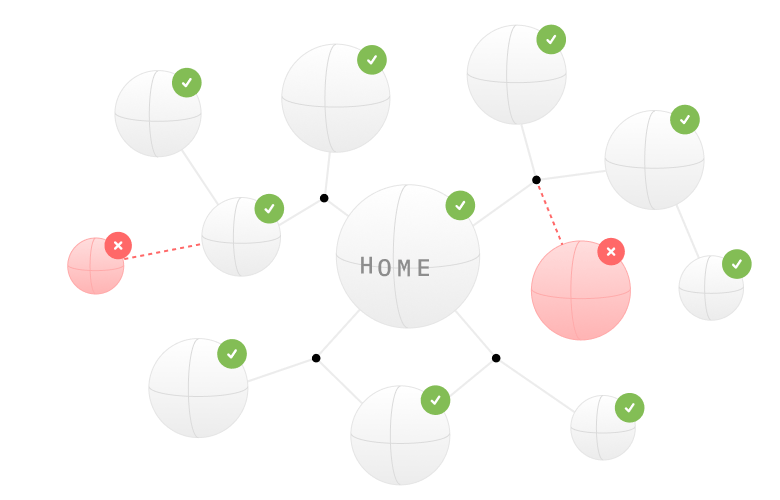
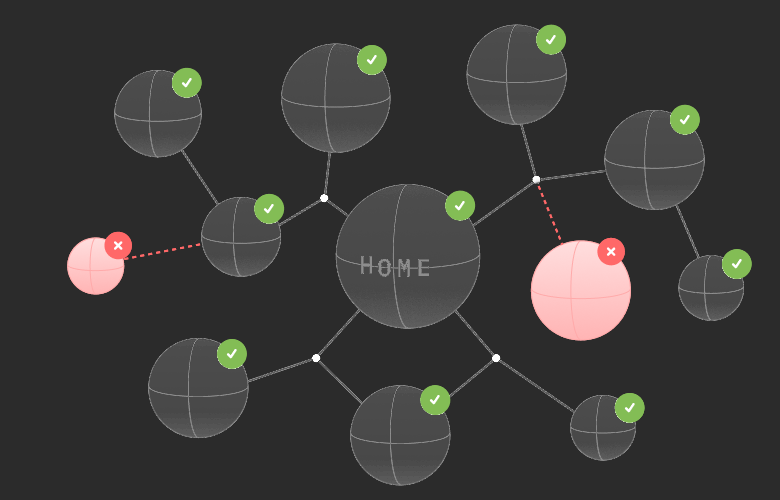
Sitemap monitoring
Elevate your SEO strategy and optimize your site. We analyse your sitemap health and check every URL for broken links.
Describe what you want to monitor
AI-powered monitoring
Use AI to verify anything you want on your websites and services with Oh Dear's AI-powered monitoring feature.
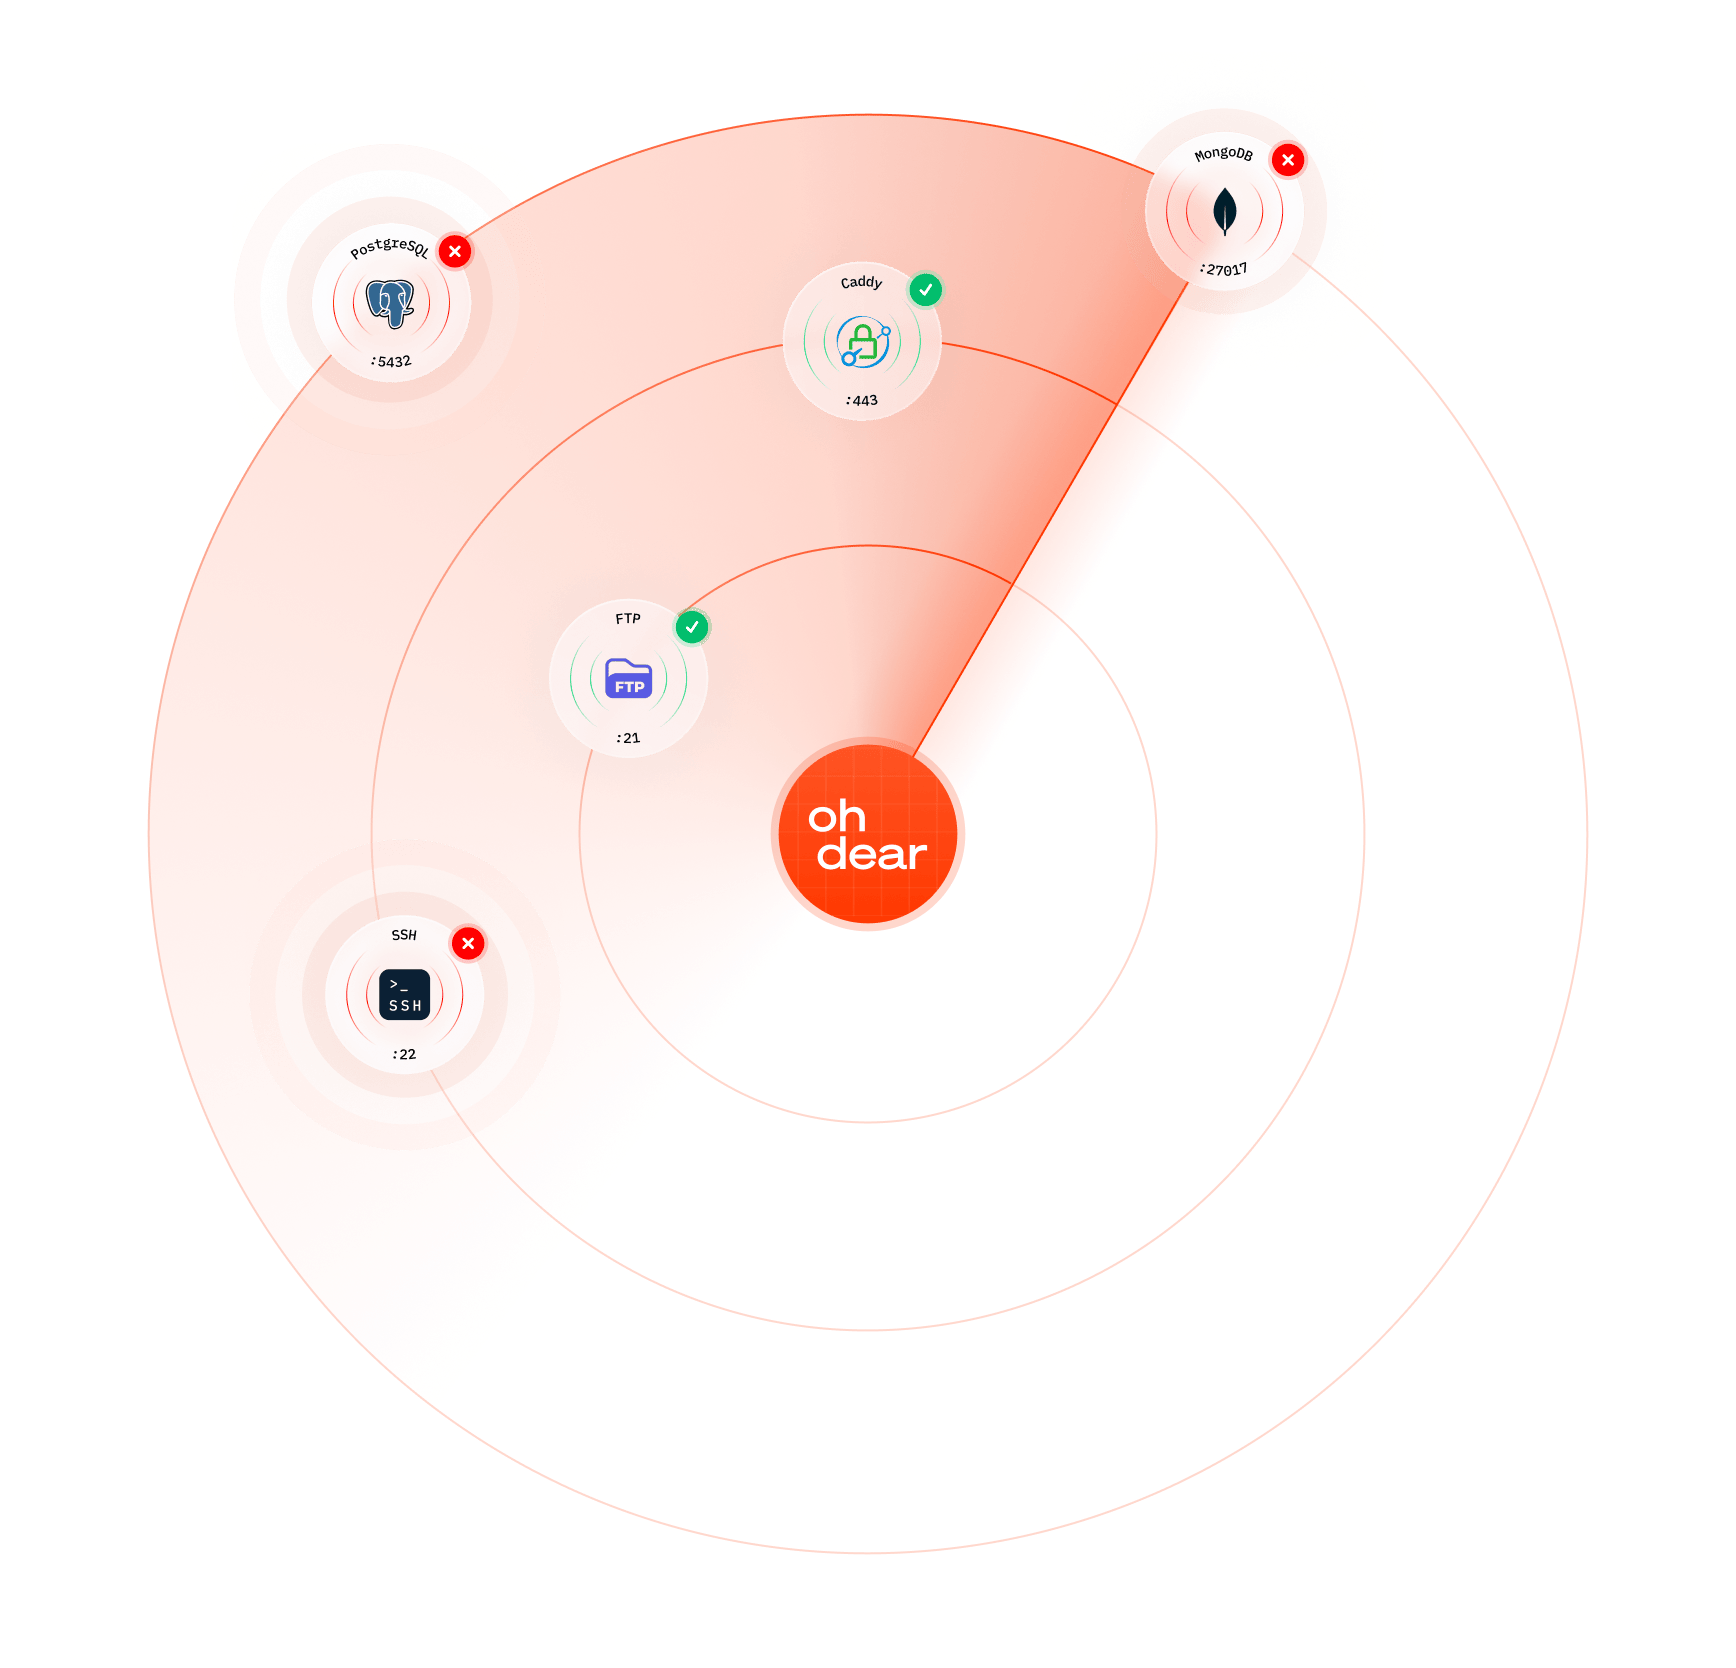
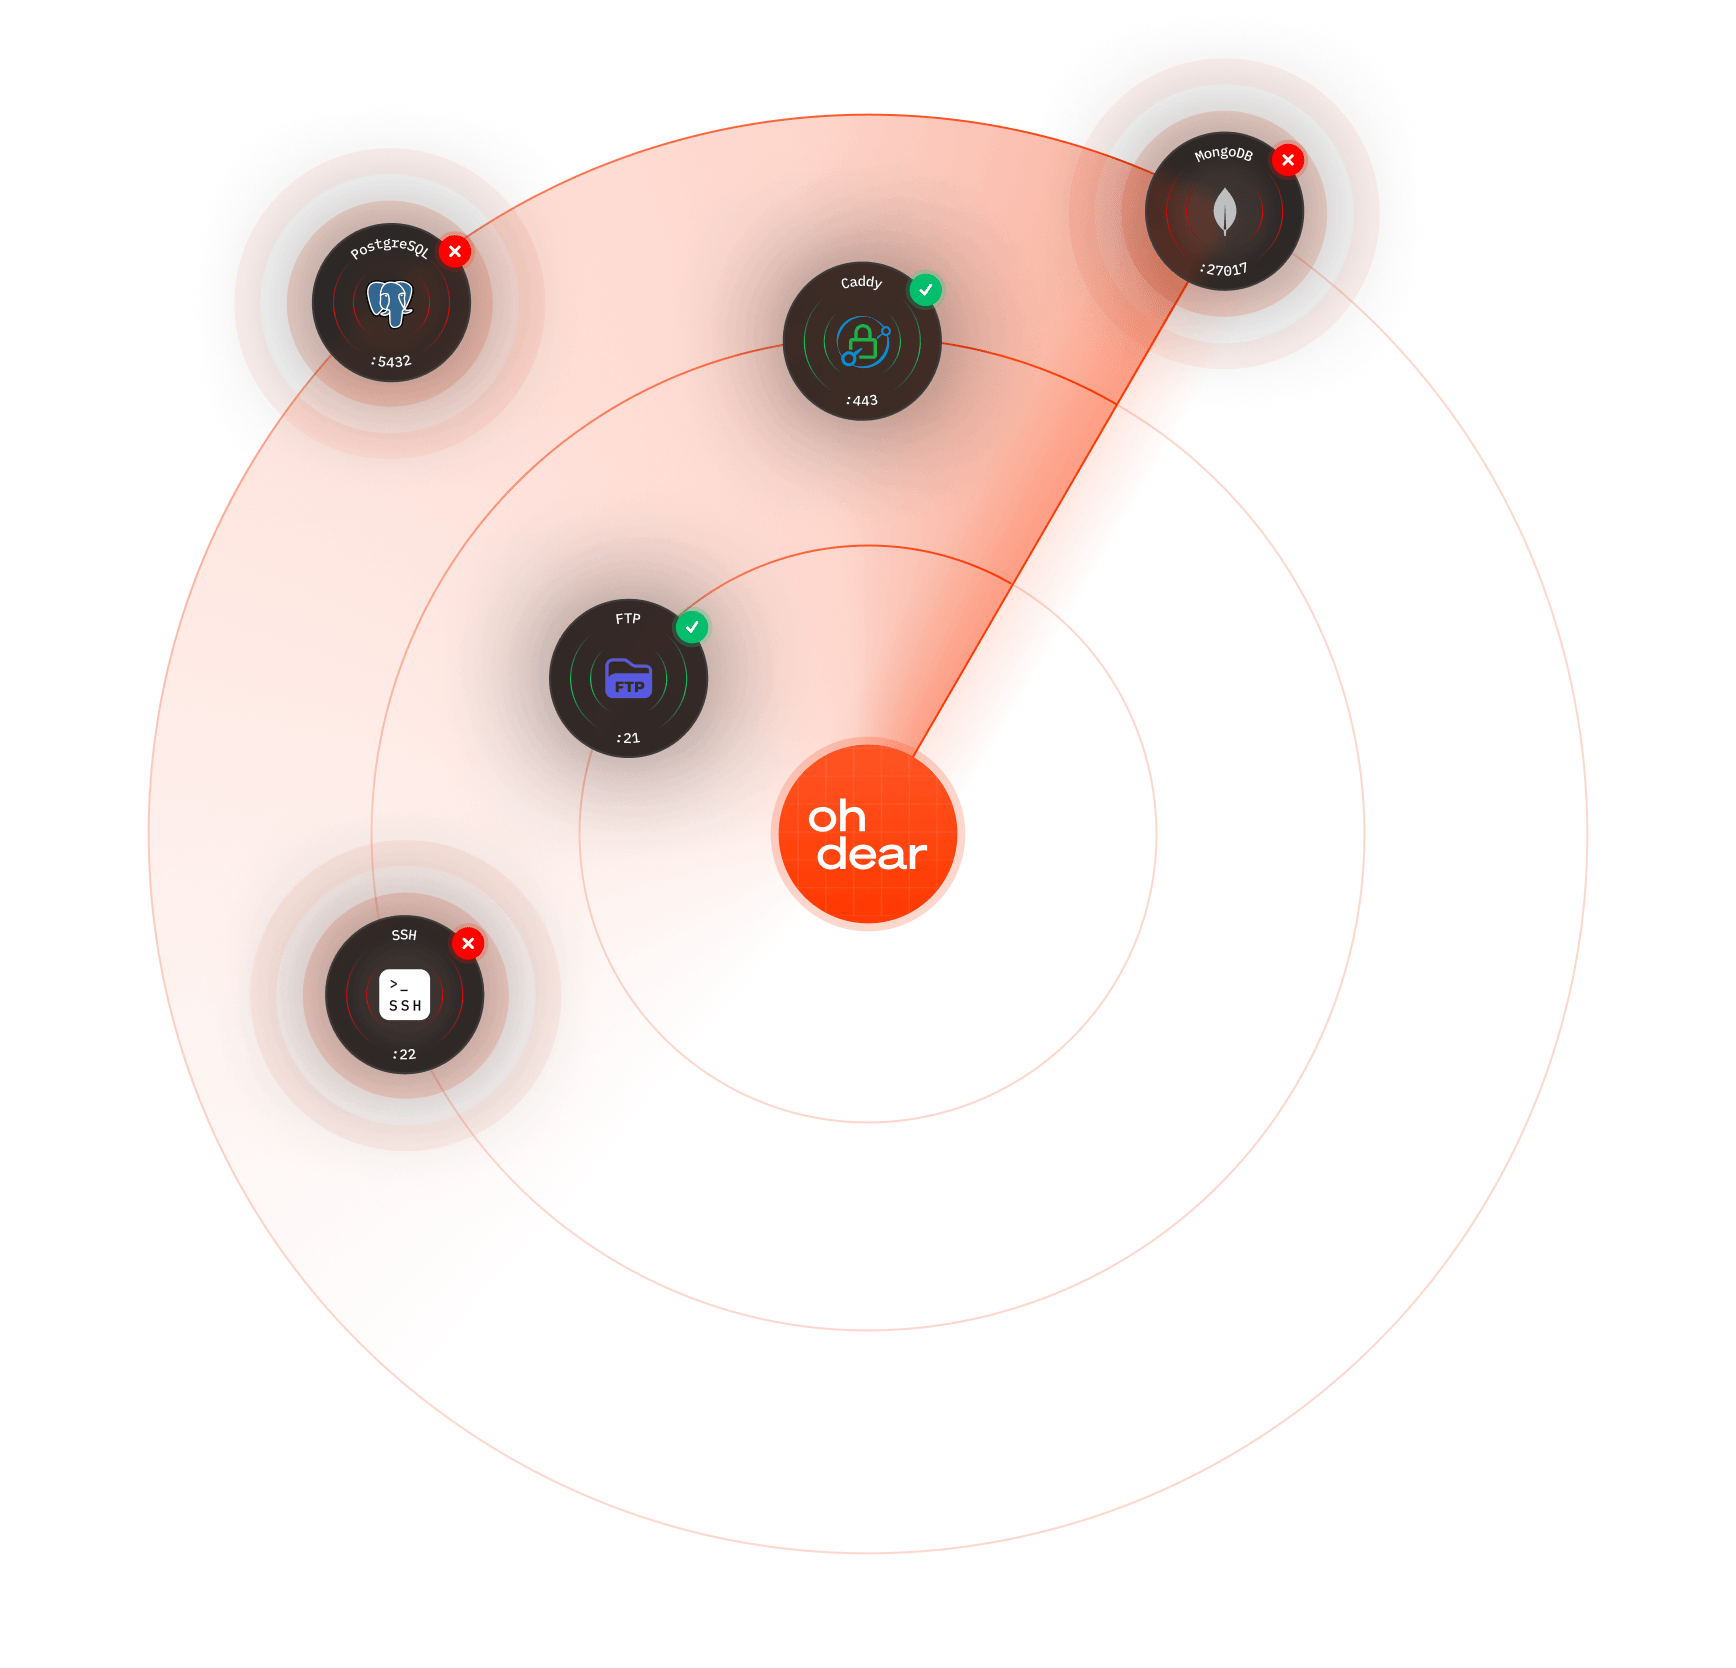
Port scanner
Define which ports should be open, and we scan all 65,535 ports on your server. Get alerted when expected ports go down or unexpected ports appear.
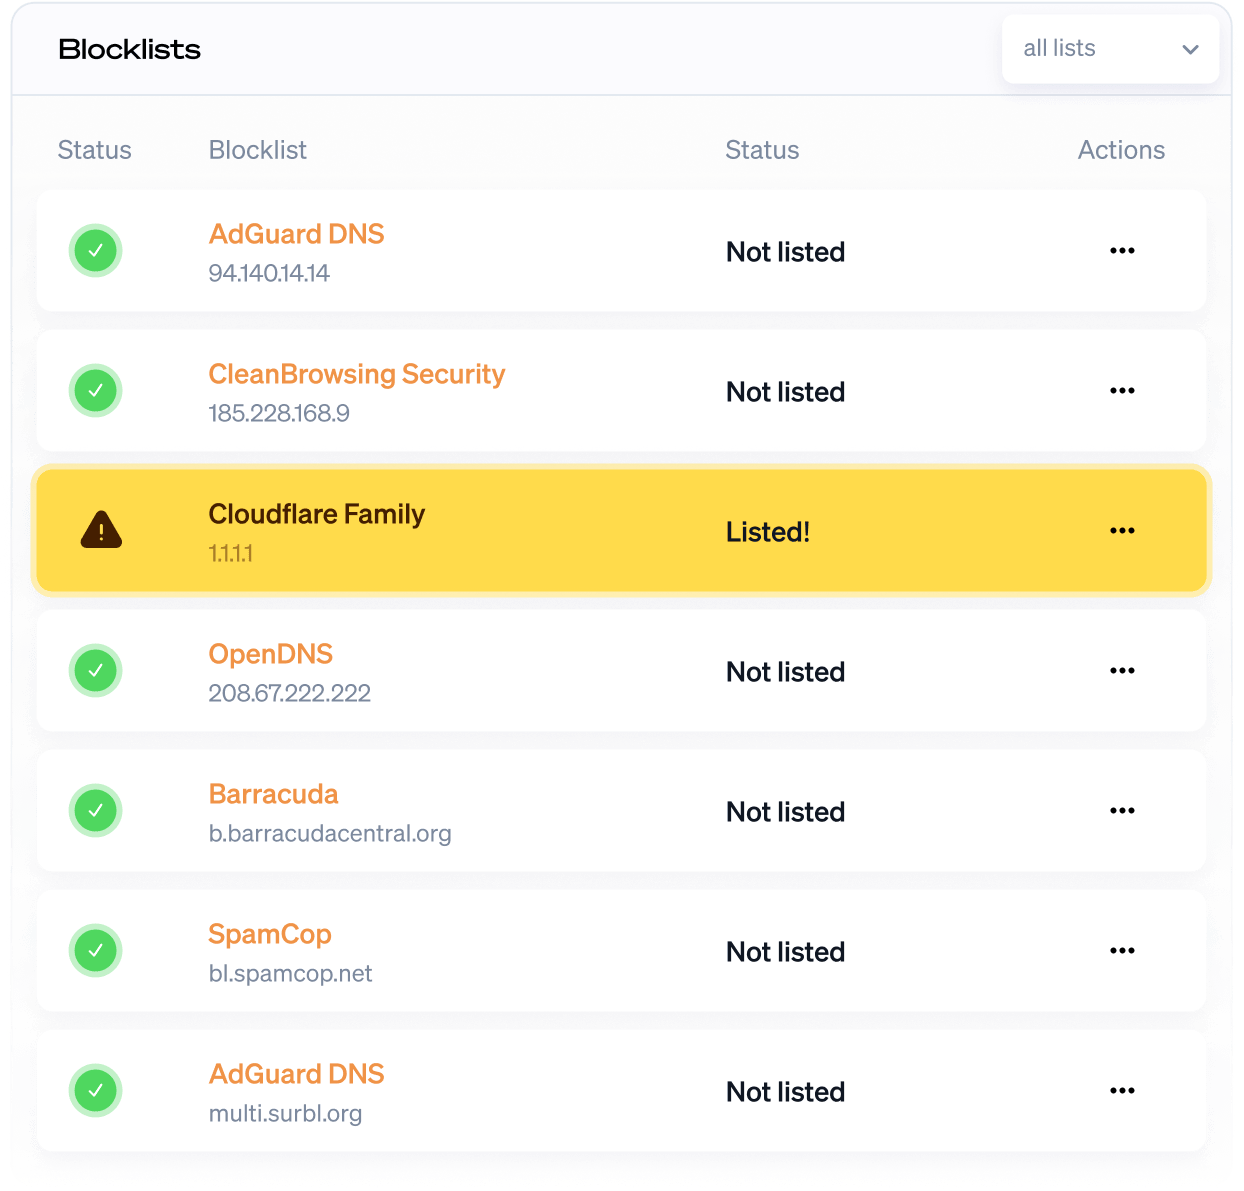
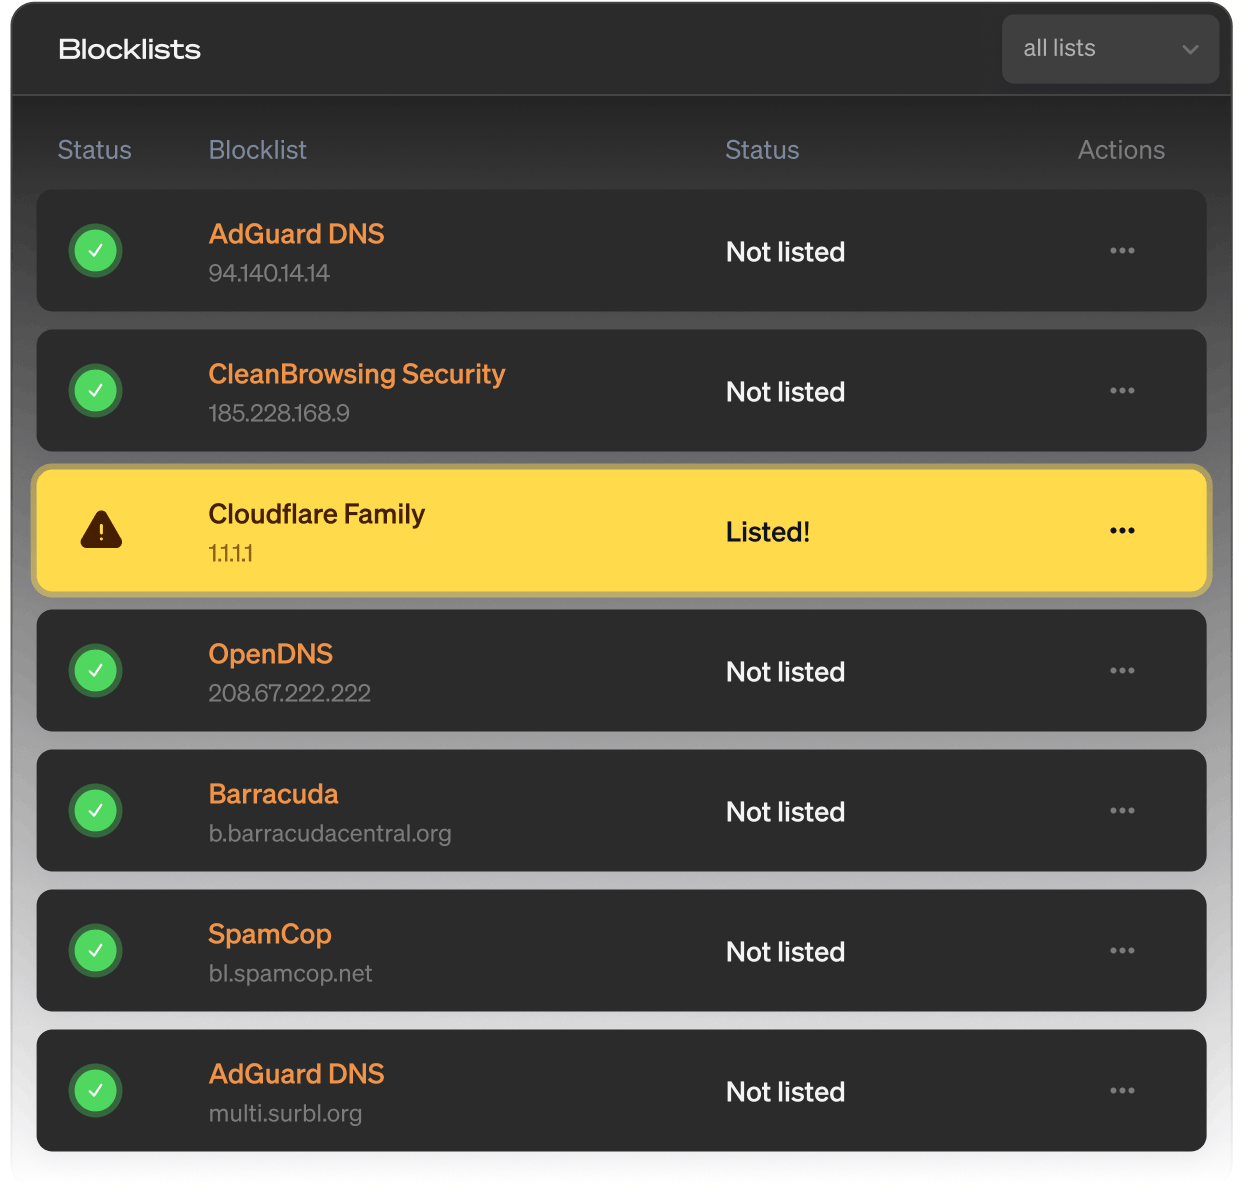
DNS blocklist monitoring
DNS blocklist monitoring helps you stay off spam and ad-block lists. Get notified when your DNS is blocked by a blacklist.
Single Sign-On (SSO)
Connect Oh Dear to your identity provider. Your team signs in with the credentials they already use.
GDPR & EU data residency
Oh Dear is a Belgian company. Your monitoring data is stored in the EU, with a signable DPA and a public subprocessor list.
Start monitoring instantly
Start a no-strings-attached 10-day free trial. You're all set in less than a minute. (No credit card needed.)
Not convinced yet? Need help? Get in touch via support@ohdear.app.